INSTALLATION, OPERATION & MAINTENANCE MANUAL
PlasmaPURE AutoClean 1500
SELF-CLEANING & NO MAINTENANCE
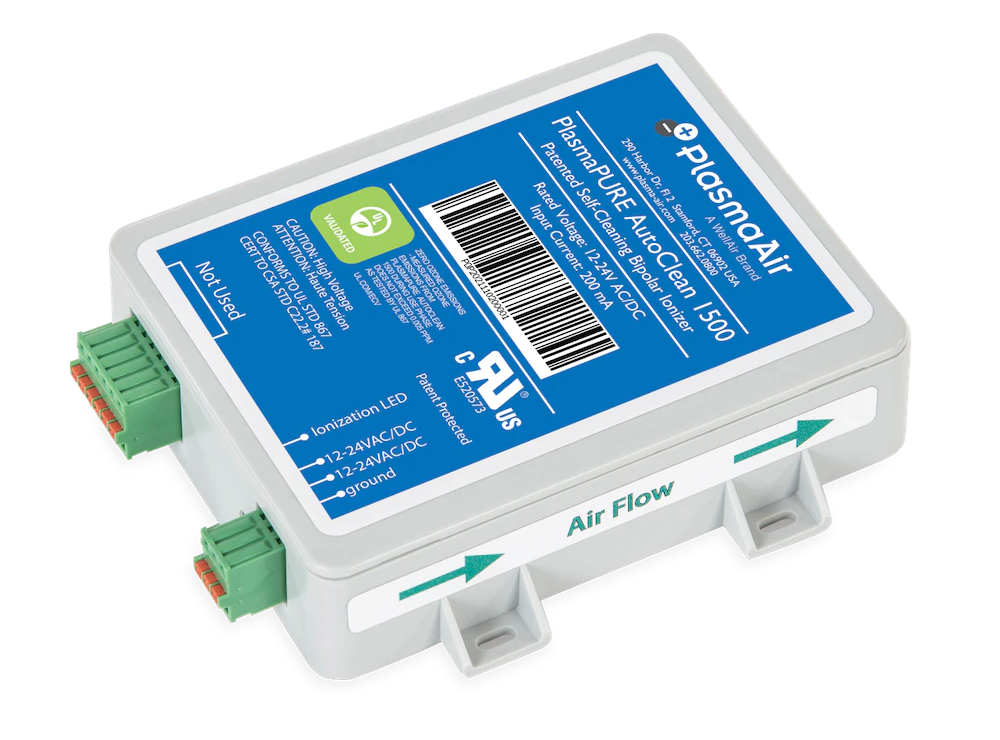
The PlasmaPURE AutoClean 1500 is a self-cleaning, maintenance-free needlepoint ionizer that produces positive and negative ions that neutralize harmful pollutants, odors and pathogens (mold spores, bacteria and viruses).
This compact self-cleaning unit automatically removes dust and dirt build-up on the needles eliminating the need for maintenance. It can be easily mounted at the fan inlet of almost any air handling system including AC Units, furnaces, mini-splits, fan coil units and VRF systems.
The AutoClean 1500 is self-contained in an ABS enclosure which has molded tabs with mounting slots. Unit accepts 12-24V AC/DC without the use of an external power supply. The AutoClean 1500 is UL 2998 validated for zero ozone emissions.
MECHANICAL INSTALLATION INSTRUCTIONS
WARNING: Do not connect to power before mechanical installation is complete.
1. Included with the ionization unit is a mounting kit containing (4) self-tapping screws, (2) magnetic strips to hold the unit in place and 6ft of 22ga power leads.
2. Mount ionization unit to allow for future access.
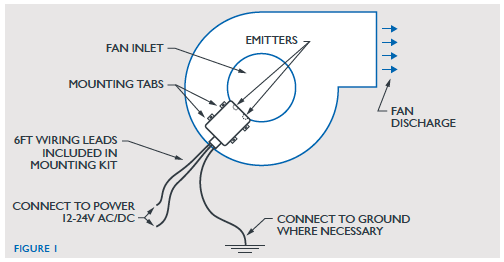
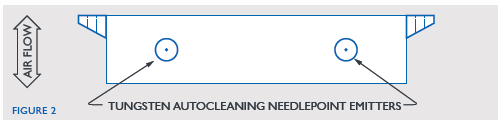
3. Mount the unit at or near the fan inlet using the slots in the mounting tabs, insuring that air flows over the two needlepoint emitters simultaneously. Mount the ionizer to the fan casing to avoid interference with the fan blades. See Figures 1 & 2.
4. The unit should be mounted downstream of the filter.
5. For best results avoid locations directly downstream of a humidifier.
ELECTRICAL INSTALLATION INSTRUCTIONS
WARNING: Do not connect to power before installation is complete.
Always disconnect power to the unit before handling the ionizer.
1. All field wiring to be in accordance with the National Electric Code Section 725 and authorities having jurisdiction.
2. It is recommended that surge protection be installed with this ionizer at the equipment level, building level, or circuit breaker panel feeding the product.
3. If a step down transformer is used to feed the ionizer, the transformer must be grounded.
4. Do not install the ionizer on the same circuit as a UV Lamp or connect to the same transformer as a UV Lamp.
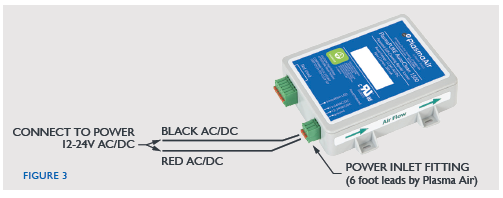
5. Connect power to ionizer using either 12V to 24V AC or DC. See Figure 3.
6. Connect power wires to power inlet fitting by pressing the orange tab firmly, inserting the appropriate wire, then releasing the orange tab. Repeat as necessary for the other wires. Strip wire insulation as necessary.
7. For best results interlock ionizer power with fan control circuit.
8. Apply power to the unit. The LED indicator will be green when power is applied to the ionizer, but then turns orange when functioning properly.
OPERATION
1. When power is applied to the unit, the ionizer will be activated. The LED will be green for several seconds indicating power has been applied to the ionizer.
2. The green LED turns orange indicating the unit is in operation mode and ions are being produced.
3. Two minutes after initial startup, the LED changes back to green and the first cleaning cycle is automatically initiated. After the cleaning cycle, the LED returns to orange indicating proper operation.
4. The cleaning cycle will repeat every 24 hours if unit operates continuously. If fan doesn’t run continuously, steps 1 through 3 will repeat once the fan is energized.
TROUBLESHOOTING
If the unit is not operating, check the following:
1. Verify that all power connections are correct and tight. Reconnect any loose wires as necessary.
2. Verify that the supply fan is running to initiate operation, and that the orange LED illuminates. If the LED is green, and cleaning cycle is not active (wait a few minutes), contact Plasma Air for further support.
Was this article helpful?
That’s Great!
Thank you for your feedback
Sorry! We couldn't be helpful
Thank you for your feedback
Feedback sent
We appreciate your effort and will try to fix the article