INSTALLATION, OPERATION & MAINTENANCE MANUAL
PLASMA AIR 660 SERIES
(MODELS 661, 662, 663, 664)
INTRODUCTION
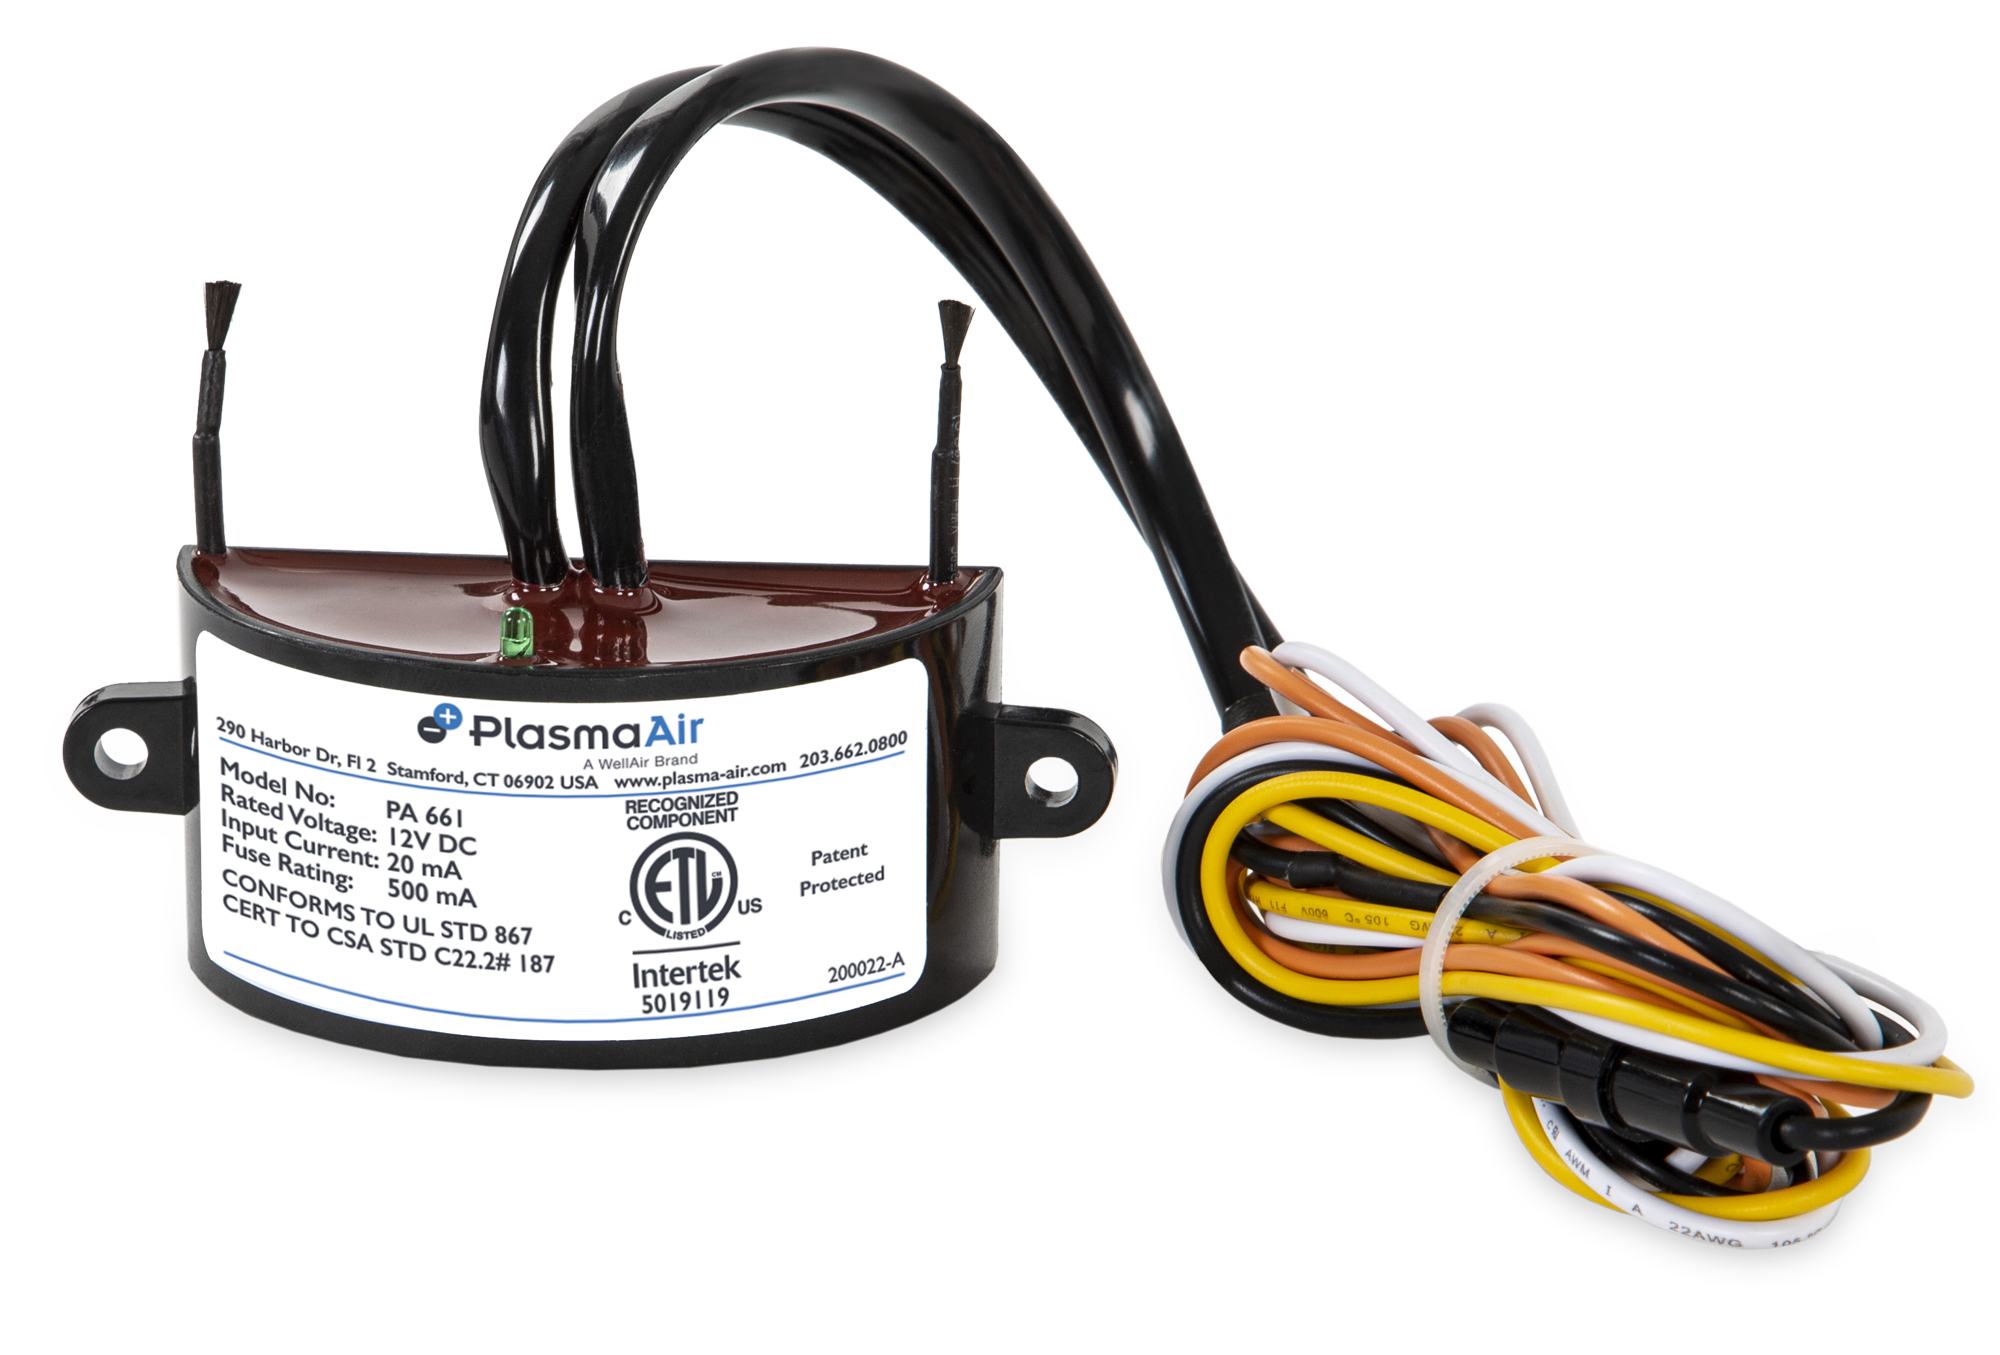
The Plasma Air 660 Series is a needlepoint brush type ionizer producing an equal amount of positive and negative ions. The PA660 Series also includes dry contacts which indicate ionizer functionality to a BAS (Building Automation System).
This ionization unit is effective in reducing harmful pollutants and odors by introducing positive and negative ions into the system airflow. This unit is highly versatile as it may be installed in an air handling unit, fan coil unit, PTAC, heat pump and even a ductless split system.
Each unit is self-contained in a potted PBT box which has molded flanges with mounting holes. Models are available to accept 12V DC, 24V AC, 120V AC and 208-240V AC without the use of an external power supply.
LOW MAINTENANCE
The PA660 Series is designed for continuous operation without requiring replacement parts. It is recommended that the device is mounted downstream of the filter to ensure the carbon fiber brushes remain clean.
CLEANING INTERVAL:
The PA660 Series was designed for low maintenance. The device should be checked semi-annually to confirm the brushes are clean for maximum output. If the carbon fiber brushes do get dirty, the instructions below outline how to clean the device:
1. Disconnect power.
2. Remove any accumulated dust on bristles of the brushes with either
compressed air or a toothbrush.
3. Reconnect power.
MECHANICAL INSTALLATION INSTRUCTIONS
GENERAL MOUNTING CRITERIA:
1. Do not connect to power before mechanical installation is complete.
2. Mount ionization unit to allow access for general maintenance.
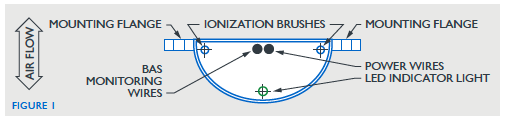
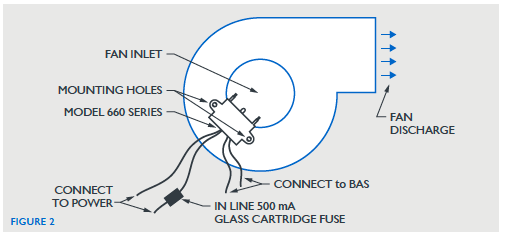
3. Mount the unit at or near the fan inlet using the holes in the mounting
flanges, insuring that the air stream flows over the 2 brushes simultaneously.
See figures 1 & 2.
4. The unit should be mounted downstream of the filter.
5. For best results avoid locations directly after a cooling coil or humidifier.
6. Ensure that there is at least 3/4" of clearance between the brushes and
any metal or other obstructions.
ELECTRICAL INSTALLATION INSTRUCTIONS
WARNING: Do not connect to power before installation is complete.
Always disconnect power to the unit before handling the ionizer.
1. All field wiring to be in accordance with NEC and Authorities Having Jurisdiction (AHJ).
2. It is recommended that surge protection be installed with this ionizer at the equipment level, building level, or circuit breaker panel feeding the product.
3. If a step down transformer is used to feed the ionizer, the transformer must be grounded.
4. Do not install the ionizer on the same circuit as a UV Lamp or connect to the same transformer as a UV Lamp.
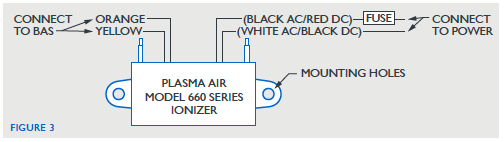
5. Connect power to ionizer using appropriate voltage per the following:
661=12V DC 662=24V AC 663=120V AC 664=208-240V AC
See figure 3.
6. The installer shall provide a power source that is properly grounded per the local AHJ.
7. Connect the yellow and orange, normally open, monitoring wires to the Building Automation System
8. For best results interlock ionizer with fan control wiring.
9. Apply power to unit. Confirm that green indicator light illuminates indicating that the ionizer is functioning properly. Confirm continuity across yellow and orange BAS monitoring wires.
OPERATION
1. When power is supplied to the ionizer, the ionizer will be activated. The green ion indicator light will illuminate and there will be continuity across the BAS monitoring wires.
2. The ionization unit is self balancing and does not require any type of adjustment.
TROUBLESHOOTING
If the unit is not working, check the following:
1. The supply fan is running and that the green light illuminates.
2. Check the power input connections to the ionization unit. Verify all connections are correct and tightened. Reconnect any loose wires as necessary.
3. Check status of ionization via BAS.
4. Test dry contact wiring with multimeter set to continuity mode.
SEQUENCE OF OPERATION
1. For units that are interlocked with the supply fan control, the BAS controls the start/stop of the air conditioning unit supply fan.
Was this article helpful?
That’s Great!
Thank you for your feedback
Sorry! We couldn't be helpful
Thank you for your feedback
Feedback sent
We appreciate your effort and will try to fix the article